
| Item | XP1 Series | XP2 Series | XP3 Series |
|---|---|---|---|
| Interface | Download/COM1: RS232 (upload/download PLC program, download OP program) | Download/COM1: RS232 (upload/download PLC program, download OP program) | |
| COM2 | AB terminal, RS485 (only slave station) | AB terminal, RS485 (PLC Port 2 communication port) | |
| Screen Size | 3.7 inches | ||
| Service Life | More than 20000 hours, ambient temperature 25°C, 24 hours operation | ||
| Storage | Screen: 64KB Data: 4KB | ||
| Programmatically | Instruction list, ladder diagram, C language combined use | ||
| Processing Speed | 0.5us | ||
| Program Capacity | 32KB | 96KB | |
| Switch Input | 10 | ||
| Switch Output | 8 | ||
| Output Type | Relay, Transistor | Relay, Transistor hybrid | Relay, Transistor hybrid |
|
|
|||
| High-speed Counting Input | Single-phase 4 channels up to 10KB | Single-phase 4 channels up to 10KB, AB phase 2 channels up to 5KB | Single-phase 4 channels up to 80KB, AB phase 2 channels up to 50KB |
| External Interrupt | 3 | 3 | 1 |
| Frequency Measurement | 3 | 3 | |
| Expansion BD Board | 1 | 1 | |
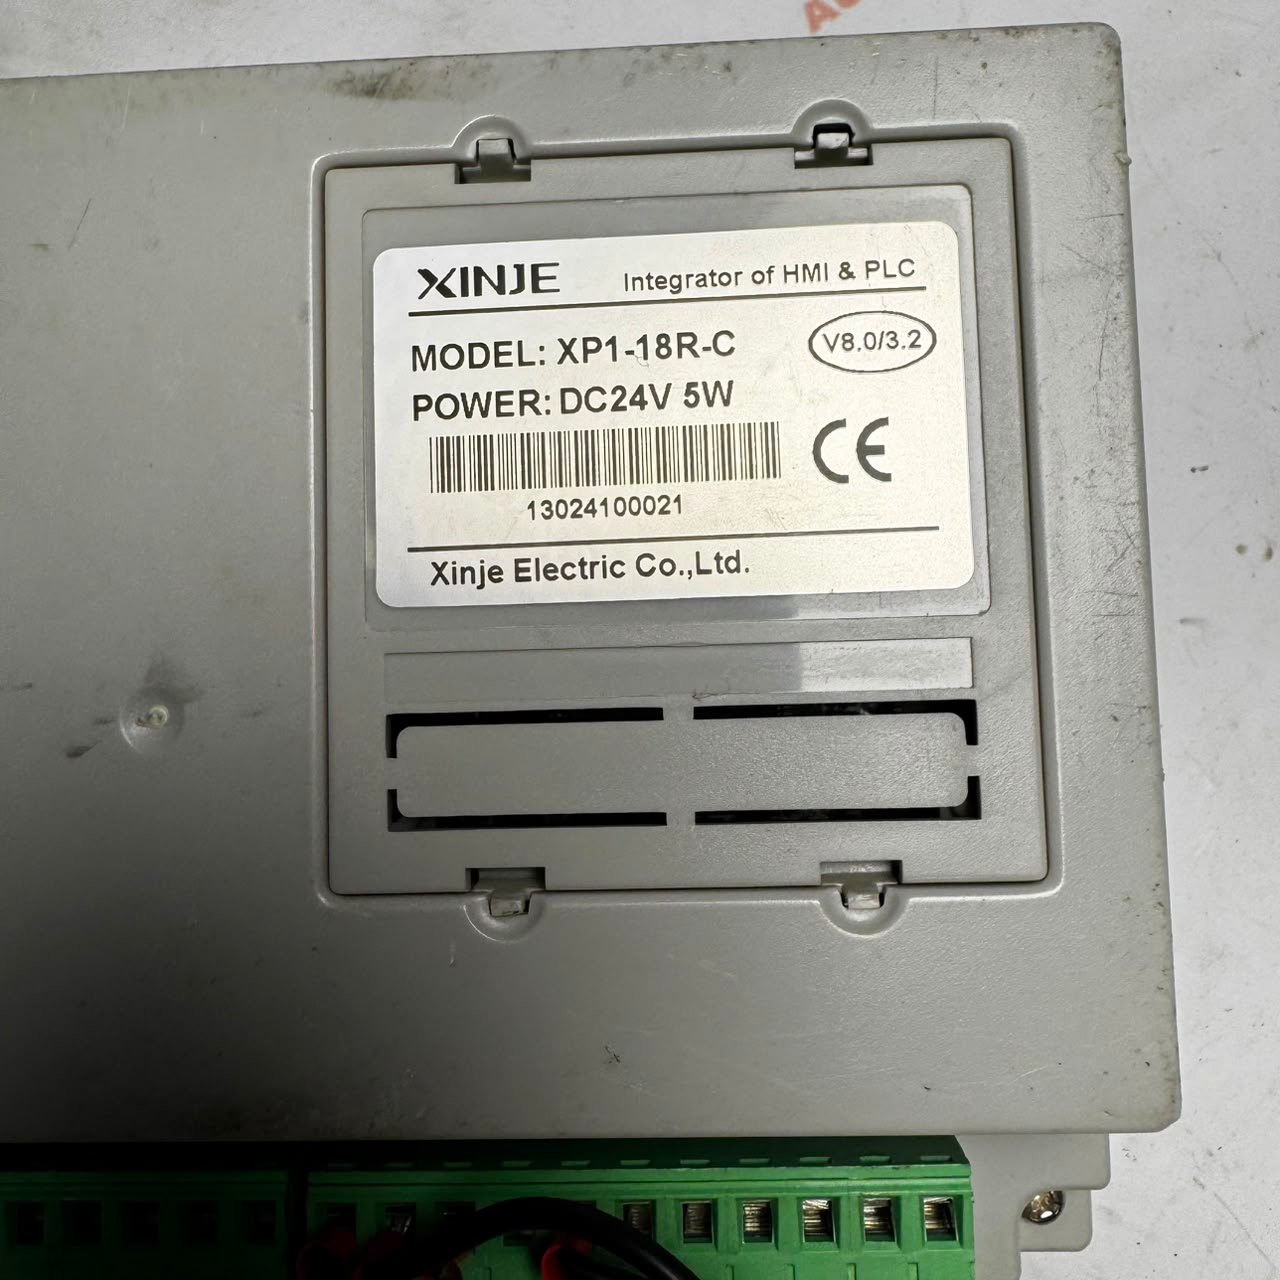
4.1 Model Naming Rules


- 1: Series model: XP series (Display area without touch function)
- 2: PLC type: 1: PLC is XC1 series; 2: PLC is XC2 series; 3: PLC is XC3 series
- 3: In/out point: 18: 10 in 8 out
- 4: Output type: R: Relay output; T: Transistor output; RT: Transistor relay mixed output (the first two transistor outputs)
- 5: BD board optional: B: XP2 series BD board is optional; None: XP2 series can’t extend BD board
Note: XP1 series do not support extended BD board; XP2 series can be equipped with BD board (differentiated by the model or not); XP3 series can be connected to BD board.
4.2 Series Specific Features
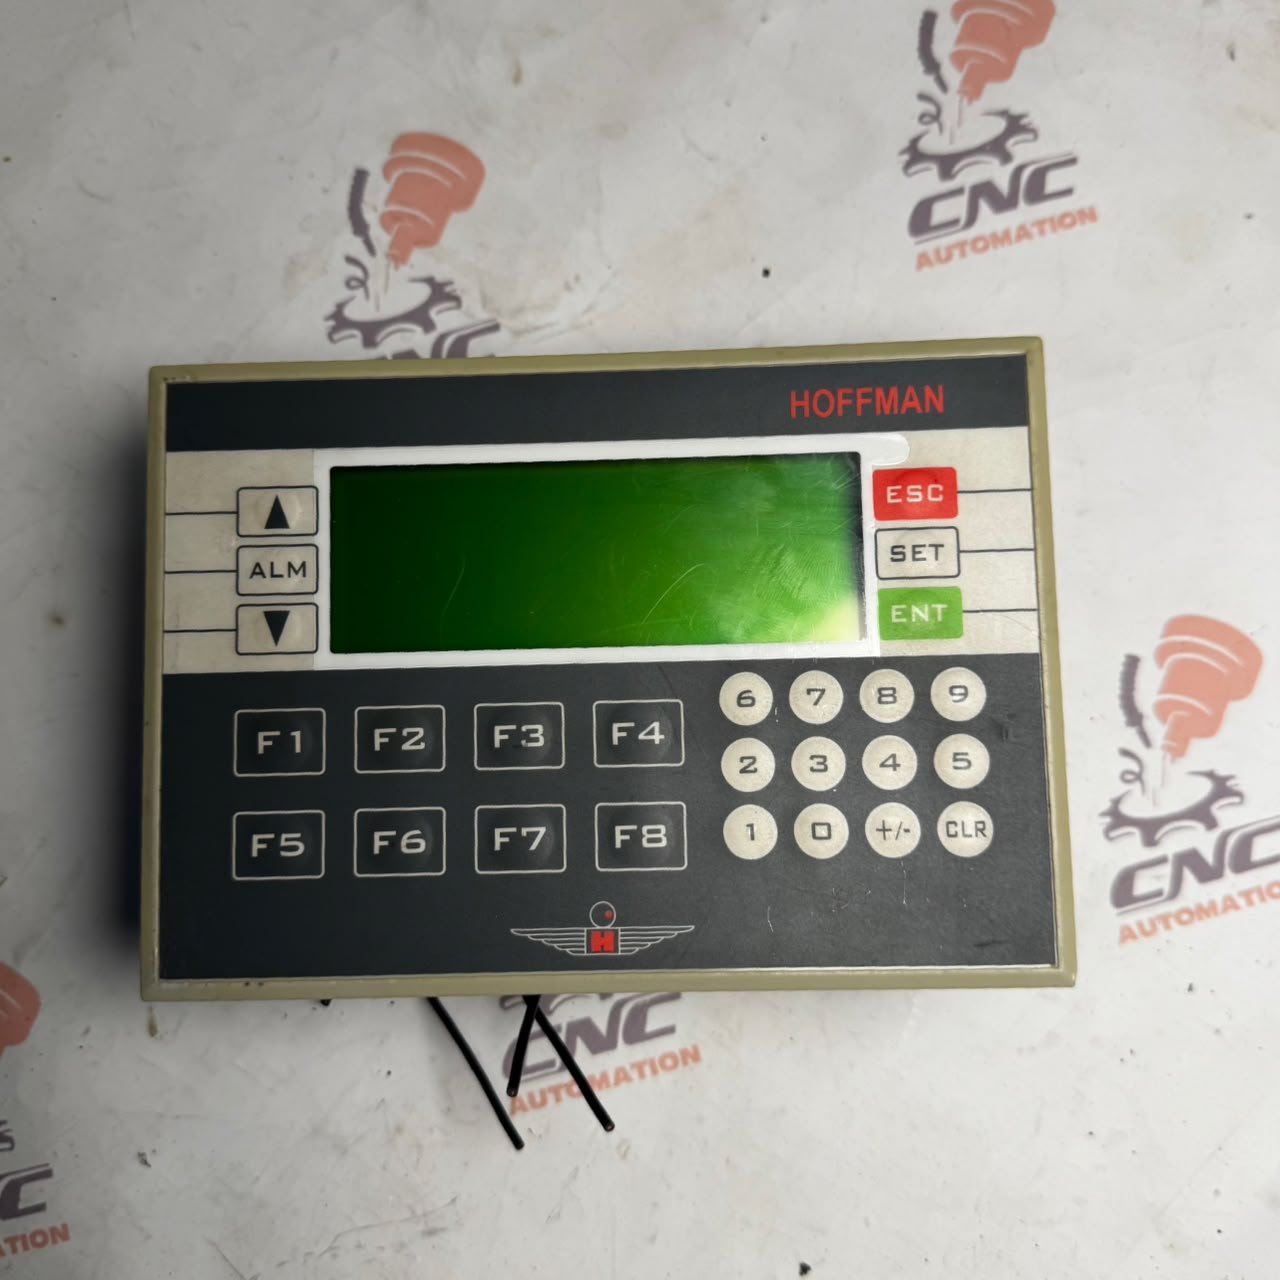
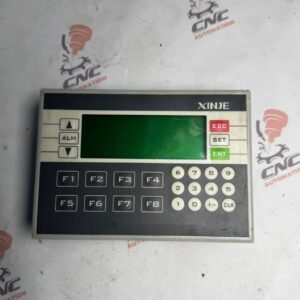
- XP Series: Integrates the functions of XC series PLC and OP series text display. Equipped with RS232 and RS485 ports for downloading and communication. Features a 3.7-inch monochrome display, 26 keys, and can freely define functions. Includes 2-axis 100KHz high-speed pulse output, high-speed counting input. RS232/RS485-64KB screen capacity, 26 function keys, command processing speed 0.5us.
- XP3 Series: 3.7-inch yellow-green LCD display, XC3 series PLC kernel, 10 in 8 out, I/O sequence control, 2 axis 100K pulse output, high-speed counting, RS232, RS485, 26 buttons, standard clock.
- XP2 Series: 3.7-inch yellow-green LCD display, XC2 series PLC kernel, 10 in 8 out, I/O sequence control, 2 axis 100K pulse output, high-speed counting, RS232, RS485, 26 buttons, standard clock.
- XP1 Series: 3.7-inch yellow-green LCD display, XC1 series PLC kernel, 10 in 8 out, I/O sequence control, 2 axis 100K pulse output, high-speed counting, RS232, RS485, 26 buttons, standard clock.
5. Setup and Installation
Proper installation is crucial for the reliable operation of your Xinje Integrator Controller. Follow these guidelines carefully:
5.1 Environmental Considerations
Ensure the installation environment adheres to the safety guidelines mentioned in Section 2.1. Avoid areas with excessive humidity, corrosive substances, dust, or conductive liquid splashes.
5.2 Mounting
The device is designed for panel mounting. Ensure adequate space for ventilation and access to wiring terminals. Secure the unit firmly using appropriate fasteners.
5.3 Wiring
All wiring should be performed by qualified personnel, adhering to local electrical codes and safety standards.
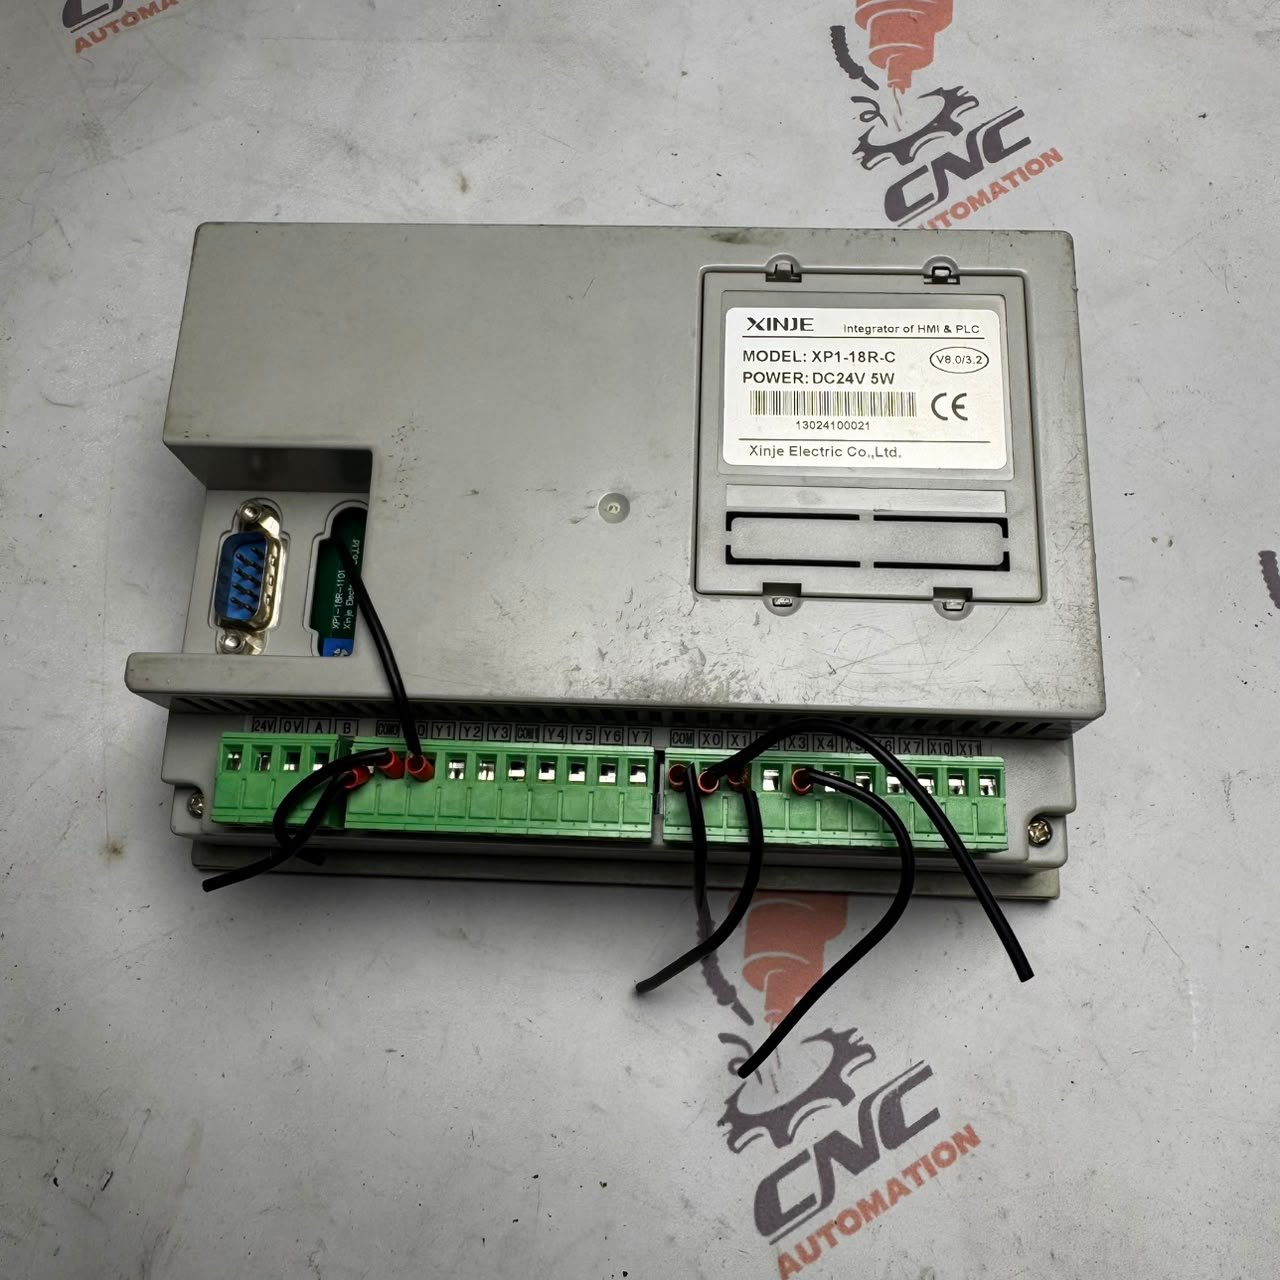
- Power Supply: Connect the DC24V power supply to the designated terminals. Verify correct polarity and ensure the voltage does not exceed the specified limits.
- Input/Output Wiring: Connect your sensors, actuators, and other control components to the 10 input and 8 output terminals as per your application’s design.
- Communication Ports: Use RS232 or RS485 cables for programming and communication with other devices. Ensure these cables are correctly connected and secured to prevent signal interference or loss.
- Grounding: Properly ground the device to prevent electrical noise and ensure safety.
6. Operation
The Xinje Integrator Controller combines HMI and PLC functions, allowing for direct interaction and control.
6.1 Powering On
After completing all wiring and installation, apply power to the device. The display should illuminate, and the system will initiate its startup sequence.
6.2 Using the Keypad and Display
The front panel features a 3.7-inch display and a keypad for navigation and data entry.

- Function Keys (F1-F8): These keys are typically programmable and their functions will depend on the specific application loaded onto the device.
- Numeric Keypad (0-9): Used for entering numerical values.
- ESC: Escape key, often used to cancel an operation or return to the previous screen.
- SET: Set key, used to confirm settings or enter configuration modes.
- ENT: Enter key, used to confirm selections or data entry.
- ALM (Alarm): Indicates alarm status or accesses alarm logs.
- Up/Down Arrows: Used for navigating menus, adjusting values, or scrolling through data.
6.3 Programming
The controller supports programming via instruction list, ladder diagram, and C language. Programming is typically done using dedicated software on a computer connected via the RS232 or RS485 communication ports.
7. Maintenance
Regular maintenance ensures the longevity and optimal performance of your Xinje Integrator Controller.
7.1 Cleaning
- Periodically clean the exterior of the device, especially the display and keypad, with a soft, dry cloth.
- For stubborn dirt, use a slightly damp cloth with a mild, non-abrasive cleaner. Do not use strong solvents or abrasive materials.
- Ensure no liquids enter the device through openings or gaps.
7.2 Inspection
- Regularly inspect all wiring connections for looseness or damage.
- Check for any signs of overheating, discoloration, or unusual odors.
- Ensure the ventilation openings are clear of dust and debris.
8. Troubleshooting
This section addresses common issues you might encounter with your Xinje Integrator Controller.
8.1 Common Issues and Solutions
- Device does not power on:
- Check the power supply connection and ensure it is providing the correct DC24V.
- Verify that the power supply polarity is correct.
- Inspect the power cable for any damage.
- Display is blank or unreadable:
- Ensure the device is powered on.
- Check for environmental conditions like extreme temperatures or humidity that might affect the display.
- Communication errors during programming/data transfer:
- Verify that the RS232 or RS485 communication cables are correctly connected.
- Ensure the correct communication parameters (baud rate, data bits, stop bits, parity) are set in both the device and the programming software.
- Confirm that the correct programming cable (e.g., RS232 to USB converter) is being used and its drivers are installed.
- Buttons are unresponsive:
- Check for any physical obstructions or debris around the buttons.
- If the device is in a specific mode, some buttons might be temporarily disabled. Try exiting the current mode.
9. User Tips
- This device is highly versatile and can be utilized as an All-in-one controller, an Operate Panel, or a Transistor Relay, depending on your specific application needs.
- For users familiar with other PLC brands like Siemens Logo, the programming logic for Xinje controllers may require some adaptation. It is recommended to seek out official tutorials or documentation specific to Xinje’s programming environment to facilitate an easier learning curve.
- When connecting for programming, ensure you have the correct RS232 to USB cable and the necessary drivers installed on your computer.
10. Warranty and Support
The Xinje Integrator Controller comes with a product guarantee. For specific warranty terms, duration, and support inquiries, please refer to the documentation provided with your purchase or contact your authorized Xinje distributor or reseller. Keep your product guarantee card (as shown in Figure 5) for reference.




Reviews
There are no reviews yet.